– Multi step –

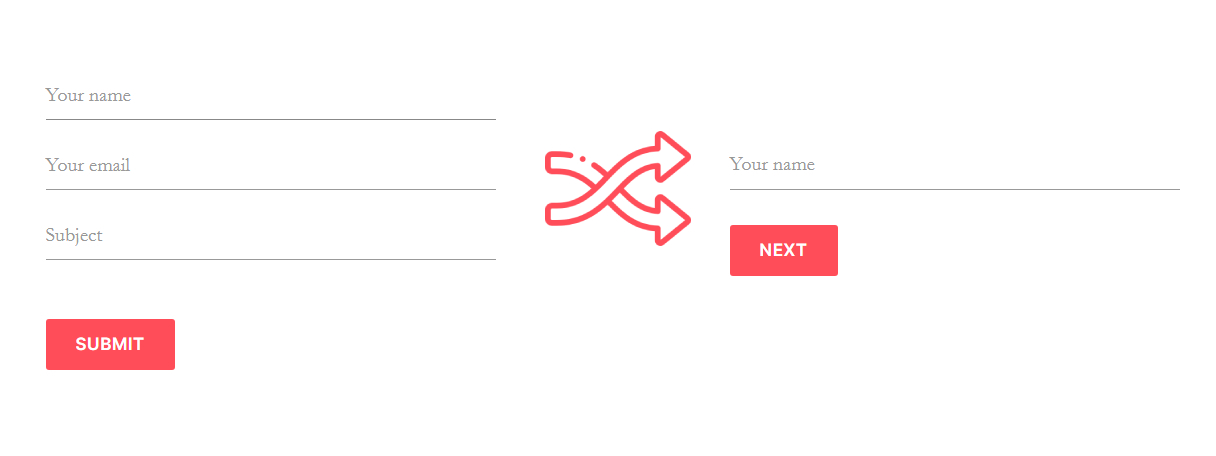
Long forms are boring.With this feature, make your forms shorter and more beautiful.

I am text block. Click edit button to change this text. Lorem ipsum dolor sit amet, consectetur adipiscing elit. Ut elit tellus, luctus nec ullamcorper mattis, pulvinar dapibus leo.

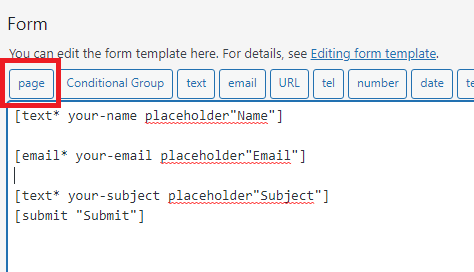
contact form page

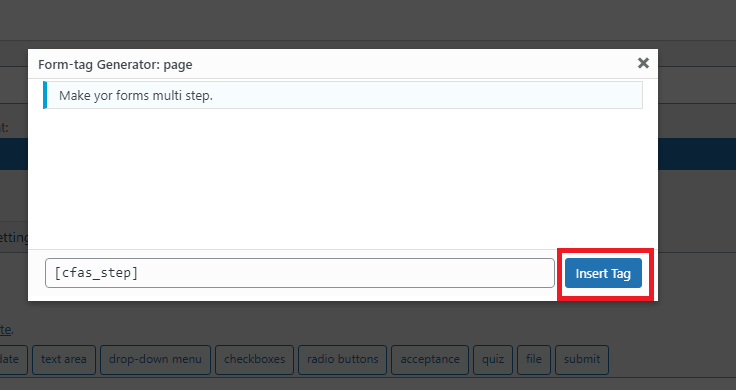
Select the insert tag.

contact form page tag

The page tag will be added to the form.

contact form multi step

– Animation –

Add various UI and UX to your forms using multi-page animations.


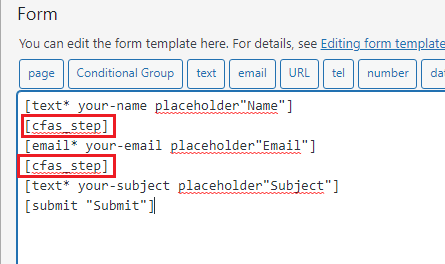
    [cfas_step]

    [cfas_step]


      [cfas_step]

      [cfas_step]


        [cfas_step]

        [cfas_step]


          [cfas_step]

          [cfas_step]

          Enter the form page and click on the page settings tab.
          From the animation section, you can select animations for your multi-page forms.
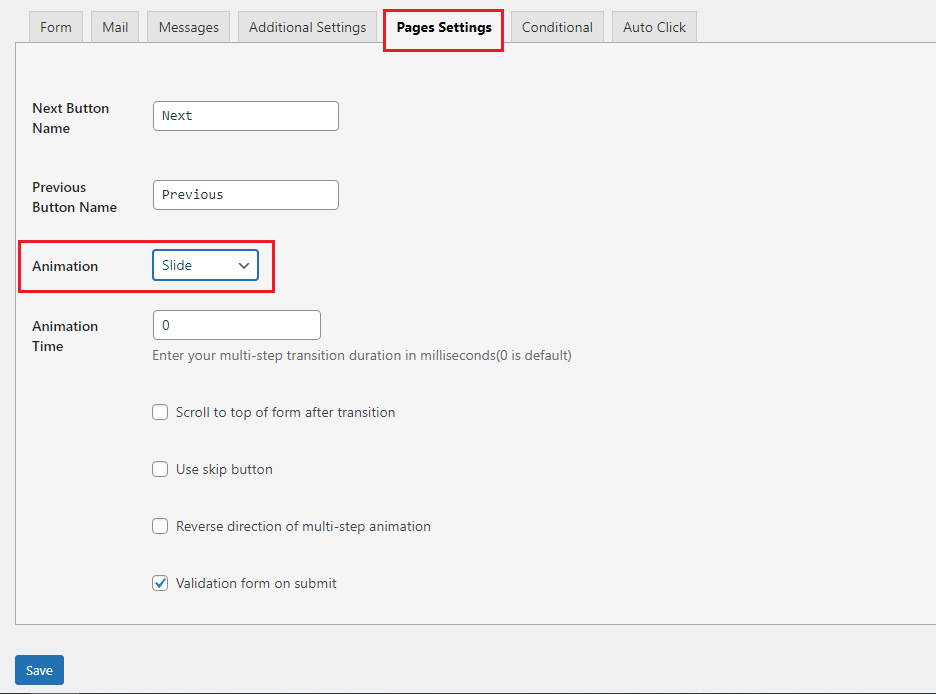
          contact form transition animation

          – Animation Duration –

          Customize the transition of multi-step forms by changing the execution time of the animation.


            [cfas_step]

            [cfas_step]


              [cfas_step]

              [cfas_step]

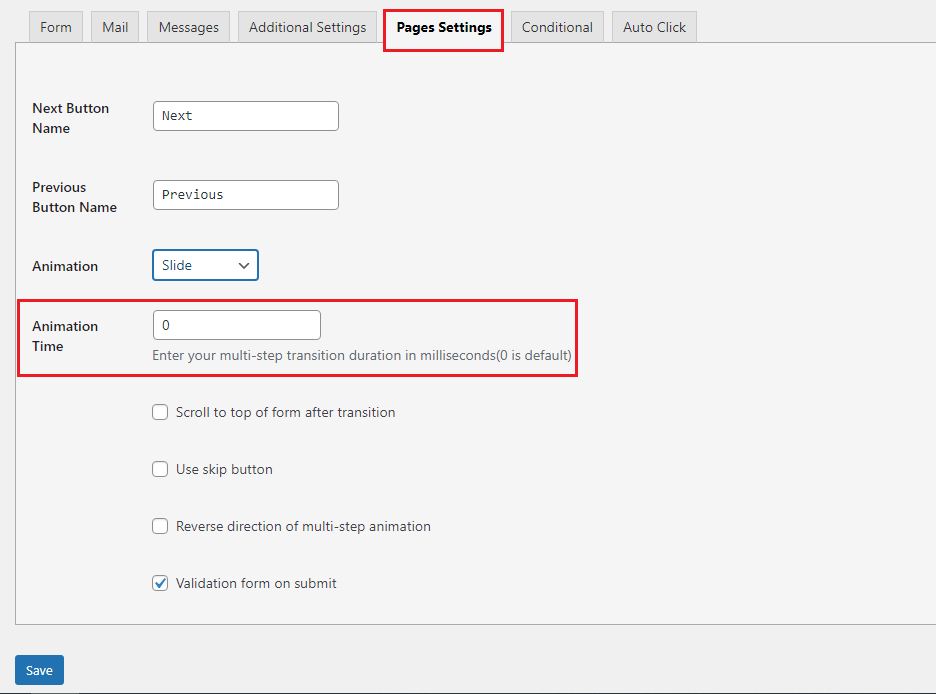
              Enter the form page and click on the page settings tab.
              From the animation time section, select the duration of the animation (the number zero, is for the default settings)

              contact form transition duration

              – Skip Button –

              If the number of steps of your multi-step forms is large, direct the user to the last page with the skip button.


                [cfas_step]

                [cfas_step]

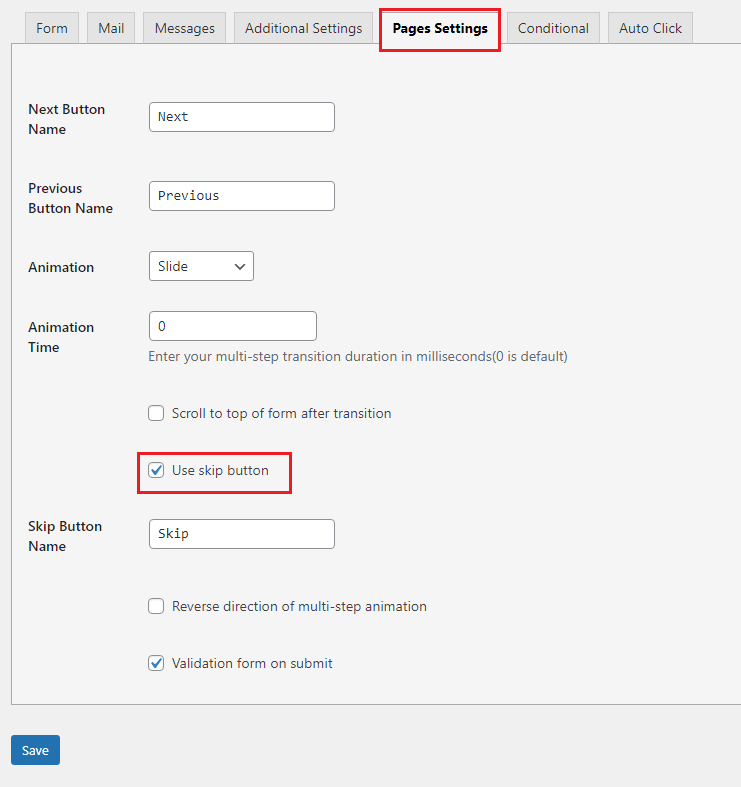
                Enter the form page and click on the page settings tab.
                Enable the specified option.

                contact form skip

                – Scroll To Next Field –

                By moving between the pages of the form, the user is directed to the top of the form for more convenience.


                  [cfas_step]

                  [cfas_step]

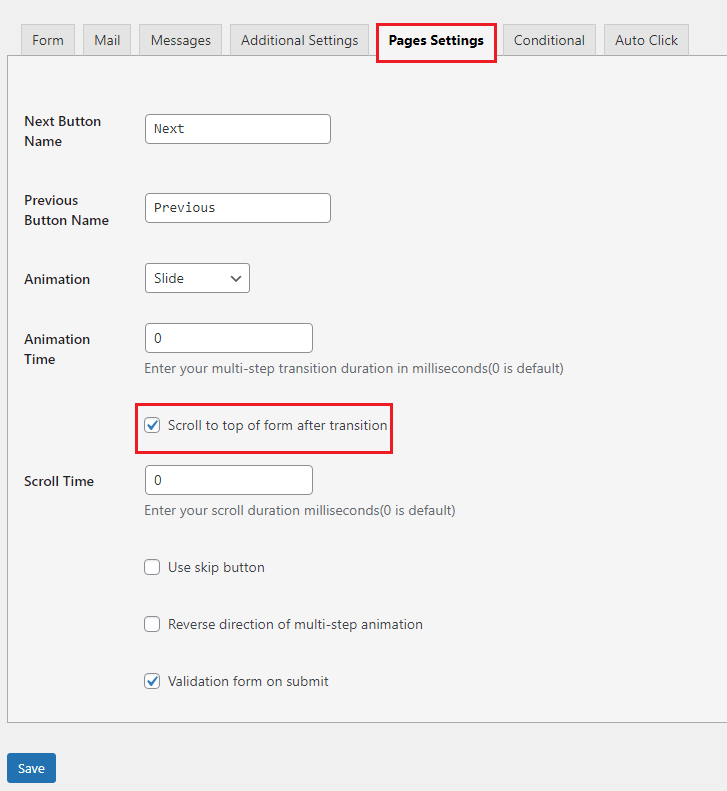
                  Enter the form page and click on the page settings tab.
                  Enable the specified option.

                  contact form scroll

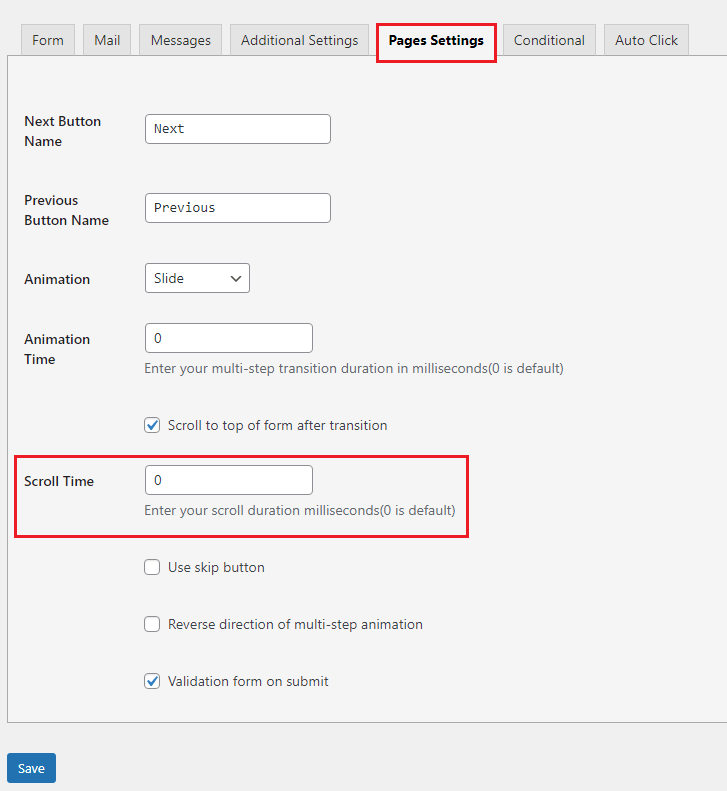
                  – Scroll Duration –

                  Manage scrolling time to the top of the form.


                    [cfas_step]

                    [cfas_step]


                      [cfas_step]

                      [cfas_step]

                      Enter the form page and click on the page settings tab.
                      From the scroll time section, select the duration of the scroll (the number zero, is for the default settings)

                      contact form scroll duration

                      – Validation Type –

                      Validate the pages of multi-step forms before the transition, or for more convenience, validate the entire form before submitting the form.


                        [cfas_step]

                        [cfas_step]


                          [cfas_step]

                          [cfas_step]

                          Enter the form page and click on the page settings tab.
                          From the specified section, you can select the type of form validation.
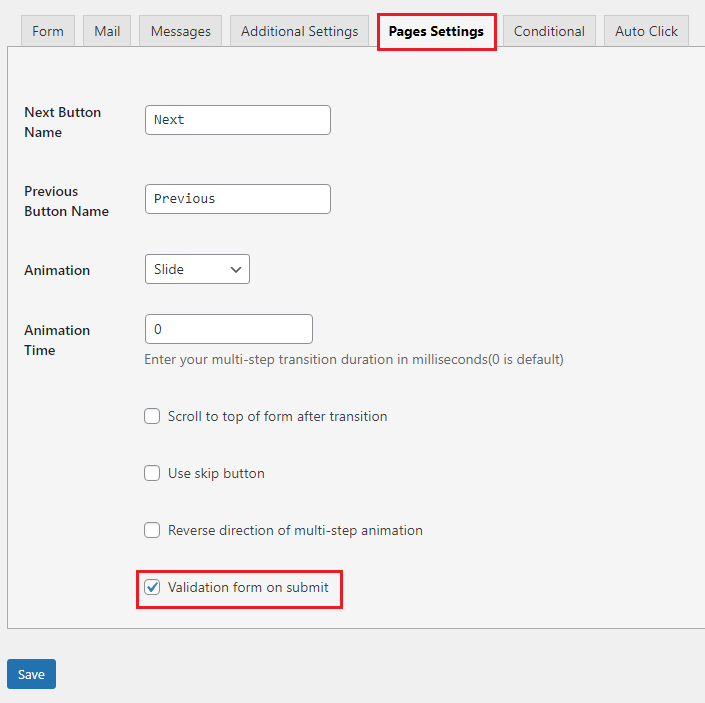
                          contact form validation type

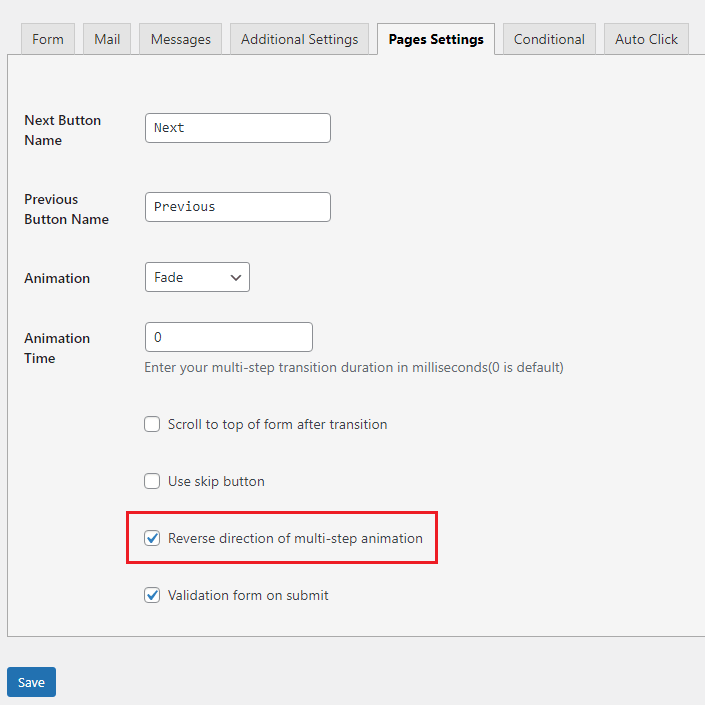
                          – Reverse Animation –

                          In addition to selecting the type of animation, you can change and reverse the direction of the animation.


                            [cfas_step]

                            [cfas_step]


                              [cfas_step]

                              [cfas_step]

                              Enter the form page and click on the page settings tab.
                              Enable the specified option.

                              cf7 reverse animation

                              – Conditional Fields –

                              Use conditional fields for your forms fields to create more efficient forms.
                              Also you can put the fields that have the same conditional in the group to use one conditional instead of several conditionals.


                                [group_con group_con-681]


                                [end_con]

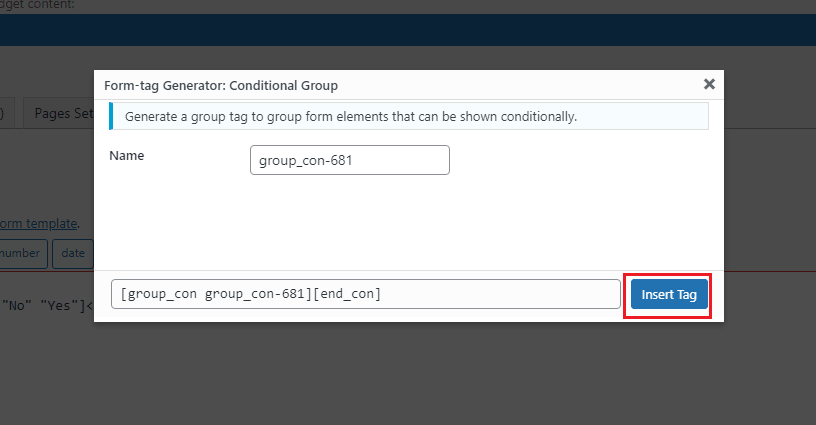
                                After installing the plugin, go to the form page and click on the conditional group tag.
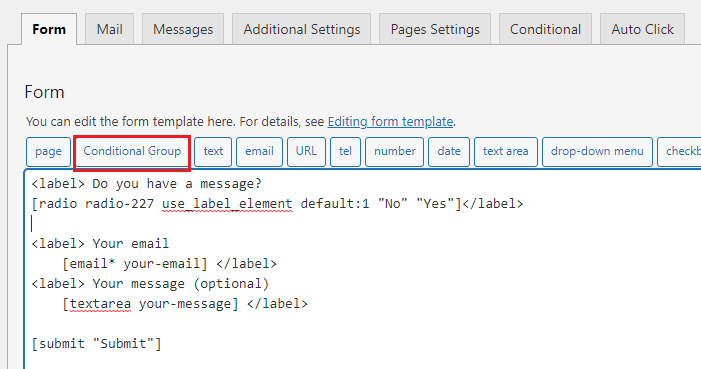
                                cf7 conditional form

                                Select the insert tag.

                                cf7 conditional tag

                                After adding the tag to the form, place the fields you want to put in a group between [group_con] and [end_con] and save the form.
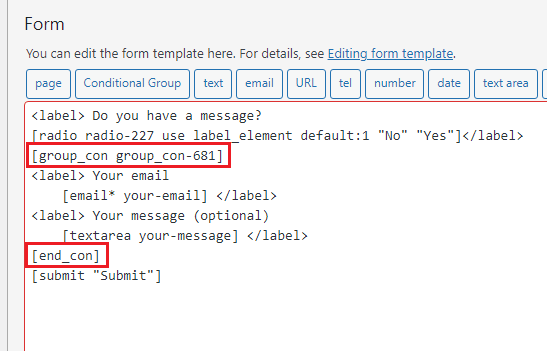
                                cf7 group field

                                Then select the conditional tab and click on add new rule.
                                Select the group name from the field and create its conditional.
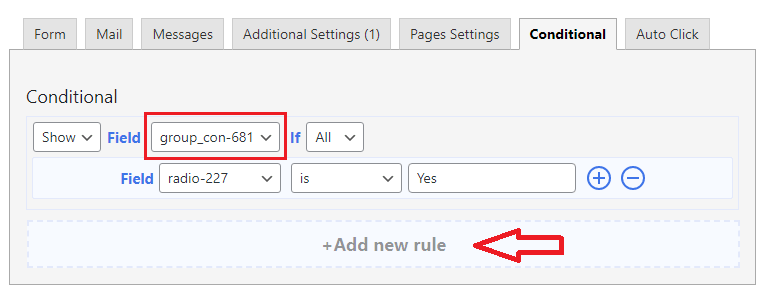
                                cf7 conditional group

                                – Conditional Page –

                                In multi-page forms, manage pages that need to be shown or hidden under certain conditions with Conditional Page


                                  [cfas_step]

                                  [cfas_step]

                                  First create multi-step form.
                                  Then select the conditional tab and click on add new rule.
                                  Select the page name from the field and create its conditional.
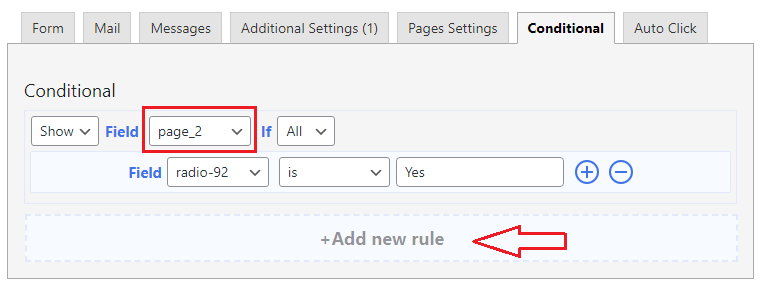
                                  cf7 conditional page

                                  – Auto Click –

                                  Automatically move the user to the next page by selecting the answers or submit the form.


                                    [cfas_step]

                                    [cfas_step]

                                    Enter the form page and click on the auto click tab.
                                    By clicking on add new rule, you can create different rules.
                                    From the specified field, you can choose whether the user is transferred to the next page or the form is submitted.
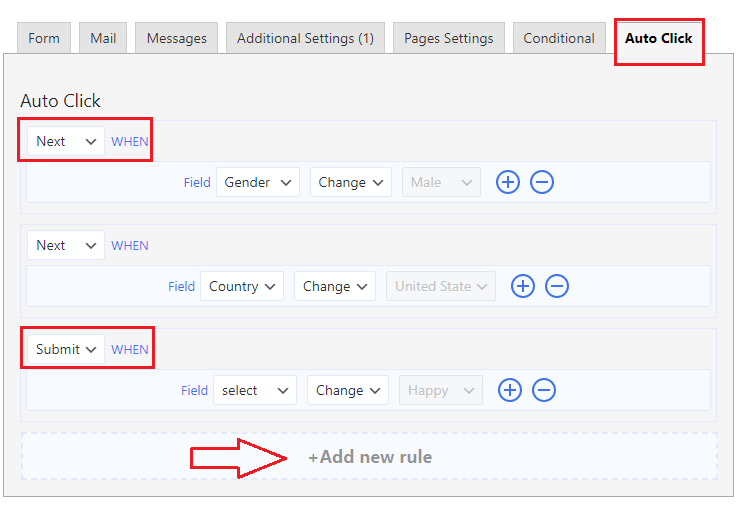
                                    cf7 auto click

                                    Note: This feature is only available for radio and select fields

                                    – Submitted Data Table –

                                    After submitting the form, view the data entered by the users in tabulated form and do not worry about losing them.

                                    After installing the plugin, the Entries submenu will be added to the contact menu.
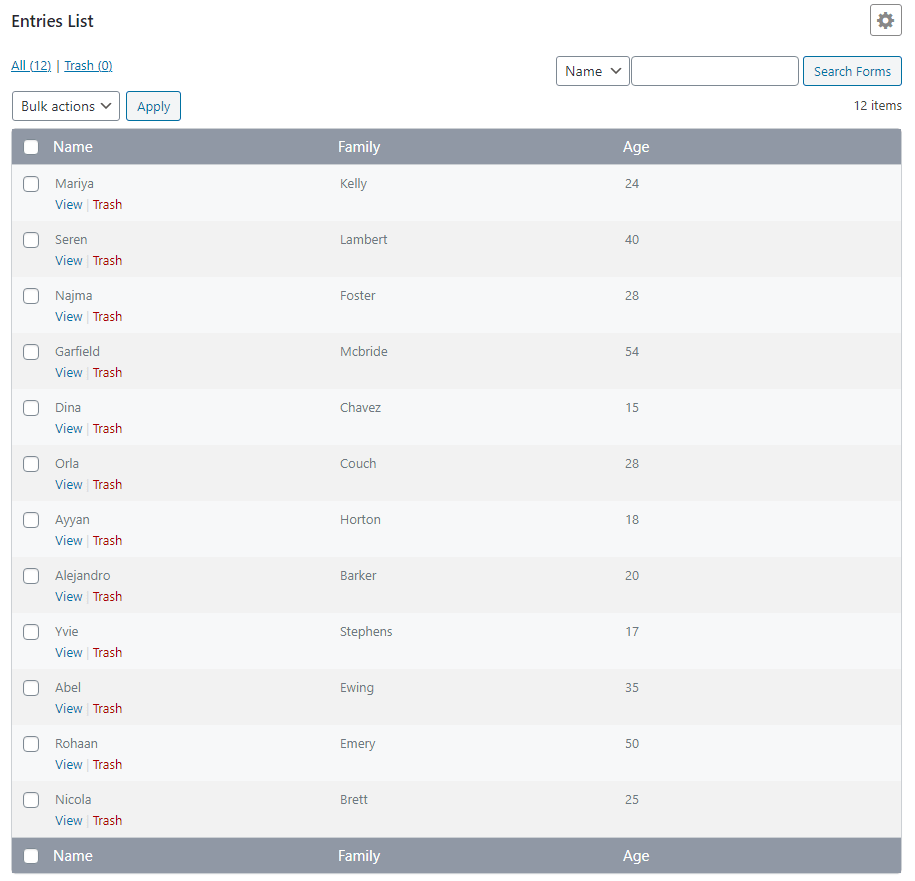
                                    Clicking on it will display a list of forms. Select the desired form.

                                    cf7 form list

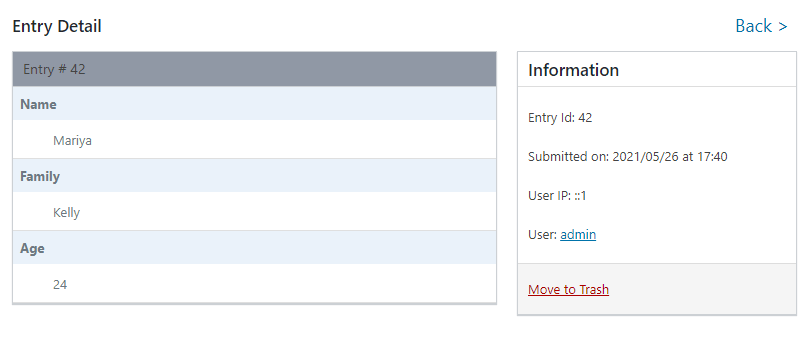
                                    The table of stored data is displayed. By clicking on view, you can see the details of the data

                                    cf7 entry detail

                                    – Manage Entries –

                                    Easily manage stored data, move it to the trash or retrieve it, view the sorted data, and delete some information permanently if you do not need it.

                                    – Show setting –

                                    In the Entries table, see the part of the information entered by the user that is more important to you and hide the rest to make your table more private.

                                    On the entries list page, click on the settings icon at the top right.
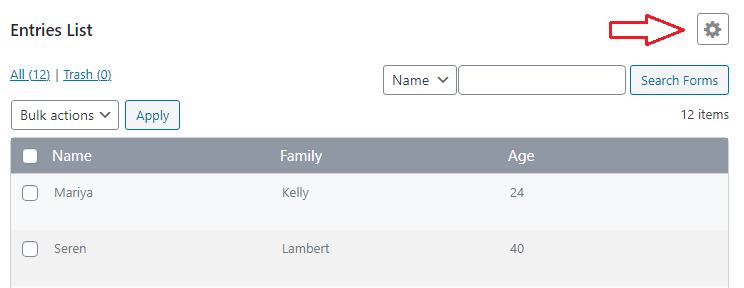
                                    cf7 entries setting

                                    Check the columns you want to be displayed in the specified area and click on Submit.
                                    Clicking reset will delete the saved settings.
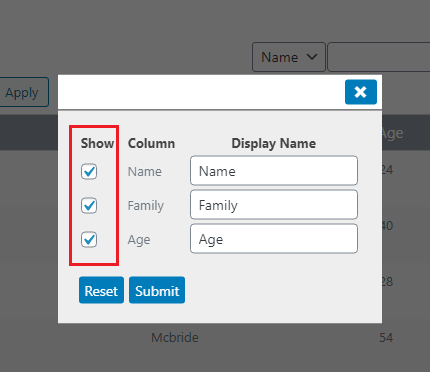
                                    cf7 show setting

                                    – Entry Column Name –

                                    You can rename the header columns of the entries table to have a more concise table that is easy to understand.

                                    On the entries list page, click on the settings icon at the top right.

                                    cf7 entries setting

                                    Enter the name you want to apply to the columns in the box provided.
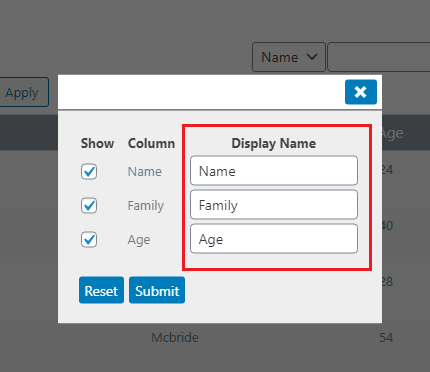
                                    cf7 column name setting